
0x00 前言
什么是headscale ?
An open source, self-hosted implementation of the Tailscale control server.
什么是Tailscale ?
Tailscale is a modern VPN built on top of Wireguard. It works like an overlay network between the computers of your networks - using NAT traversal.
Everything in Tailscale is Open Source, except the GUI clients for proprietary OS (Windows and macOS/iOS), and the control server.
The control server works as an exchange point of Wireguard public keys for the nodes in the Tailscale network. It assigns the IP addresses of the clients, creates the boundaries between each user, enables sharing machines between users, and exposes the advertised routes of your nodes.
A Tailscale network (tailnet) is private network which Tailscale assigns to a user in terms of private users or an organisation.
之前使用wireguard和zerotier(甚至还试了docker版的zerotier root模式)搭建了局域网,现在用headscale再额外搭一个网。有人会嫌网络多吗?反正我不会。我对搭局域网的打洞软件要求不外乎是那么几点:
- 可迁移
- 不跨境
- 最好有面板
0x01 前置准备
- docker
- docker-compose
- cloudflare tunnel (自行注册,需要绑定支付方式)
- 域名托管在cloudflare
0x02 headscale服务端
- headscale部分
1 | mkdir -p headscale/container-config |
cloudflare tunnel部分
众所周知,国内的vps的80和443都是默认不启用的,这里用cloudflare tunnel绕过80和443的限制,并且转发headscale-ui和headscale的服务达到国内vps就可以搭建的目的。
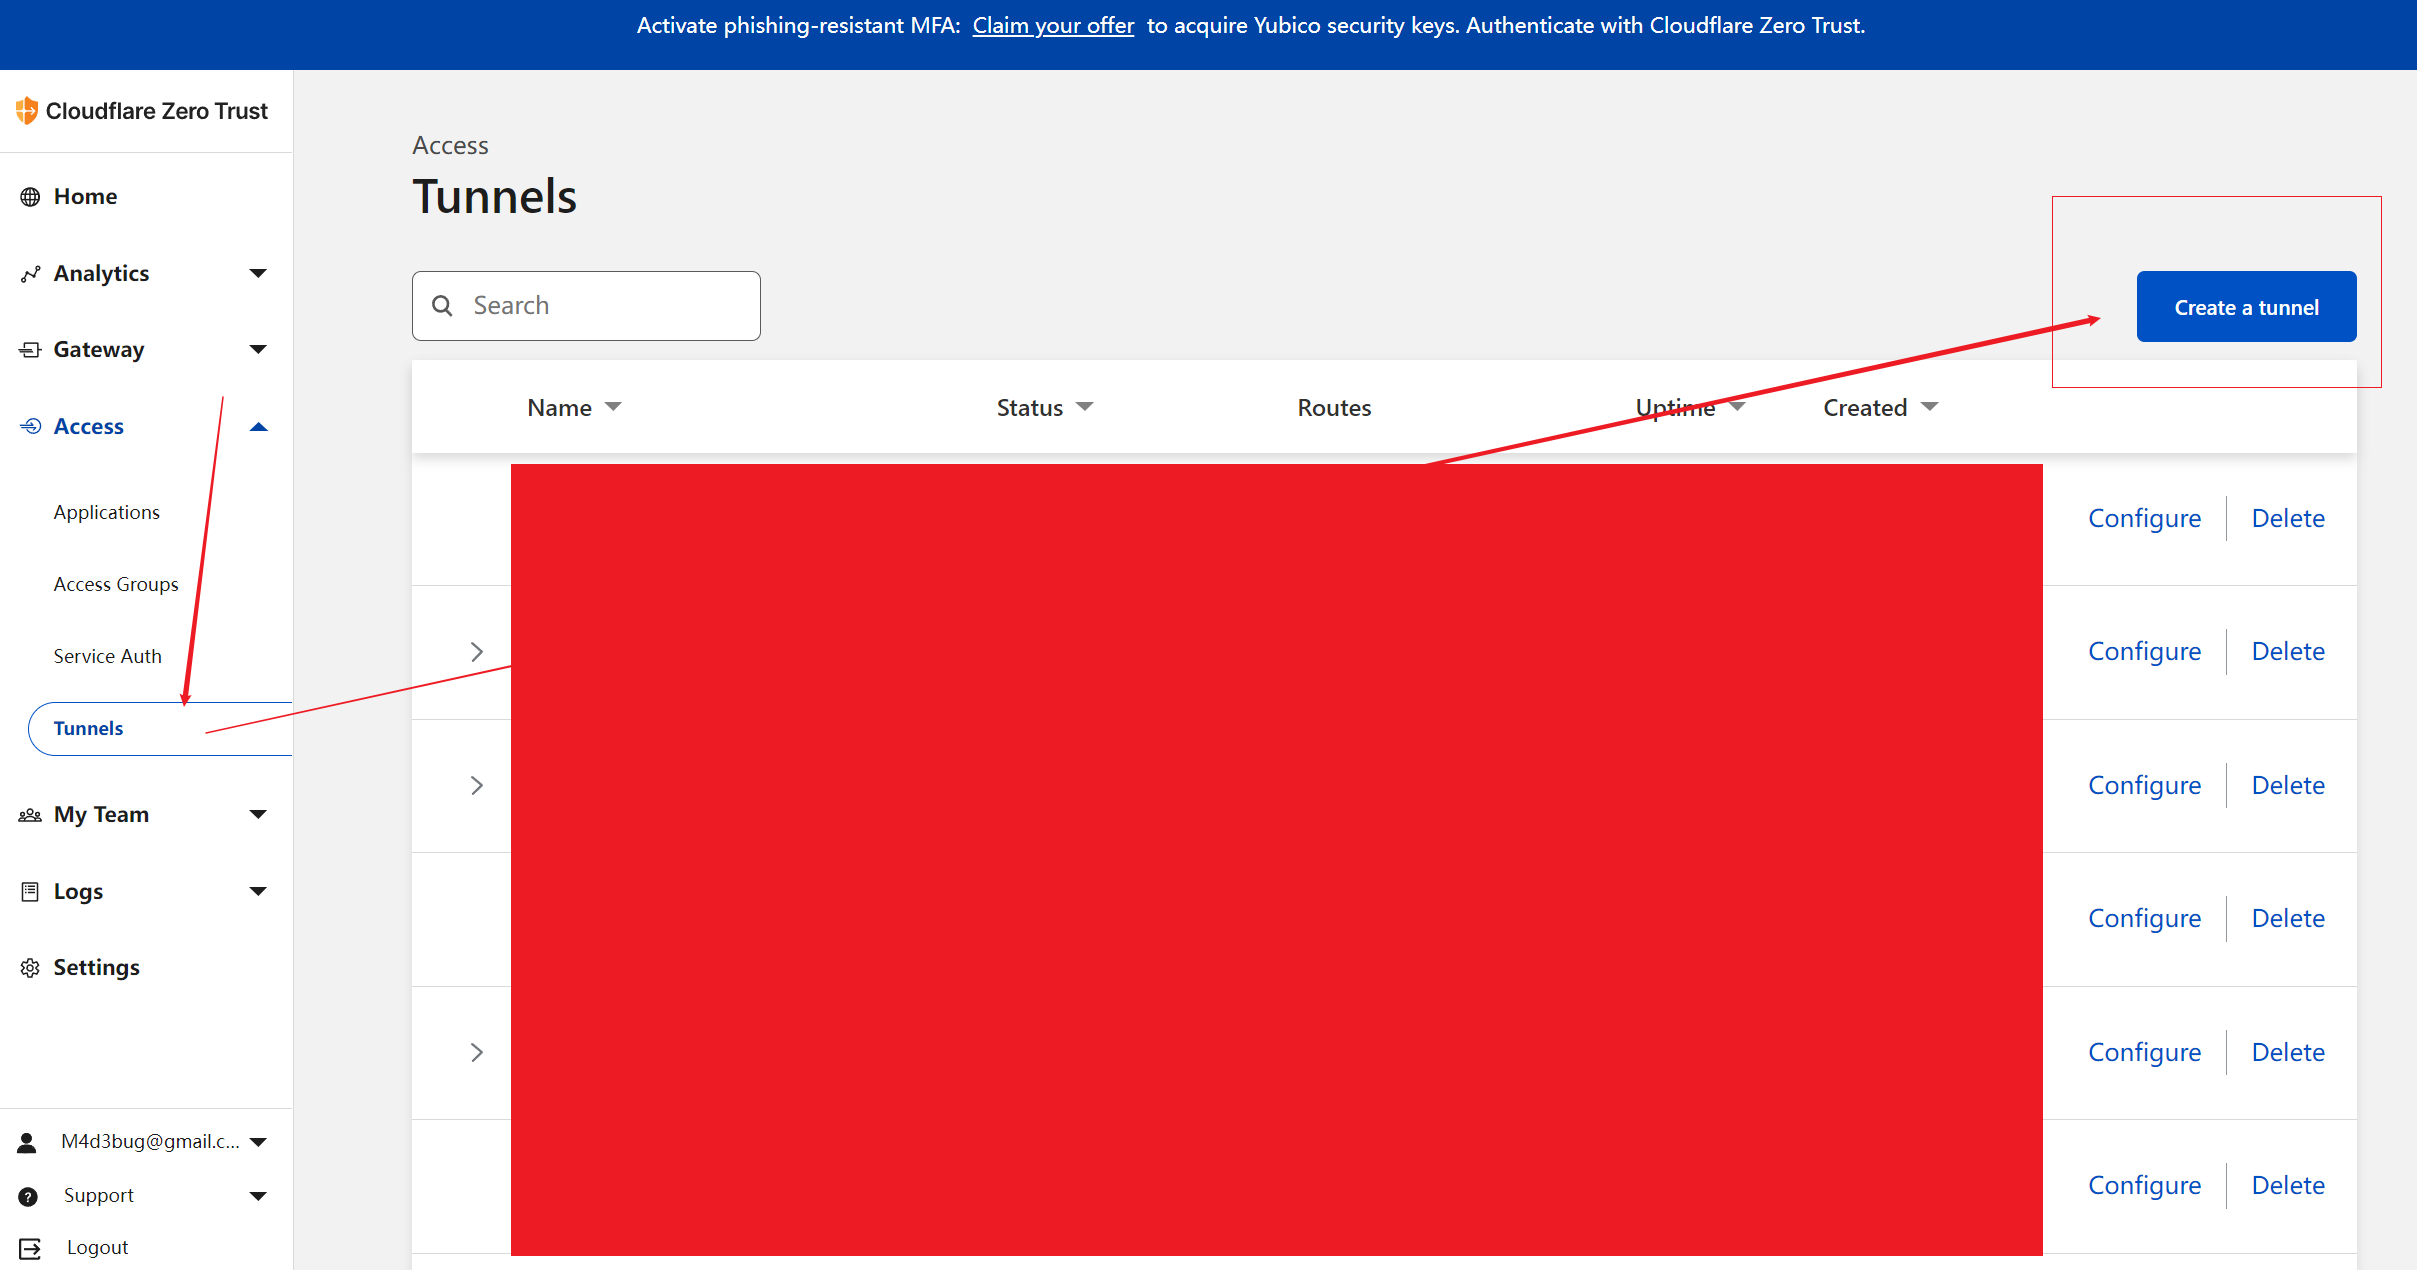
打开cloudflare zero trust的界面,Access >> Tunnels >> Create a tunnel >> Tunnel name(随便填) >> Save tunnel >> Docker
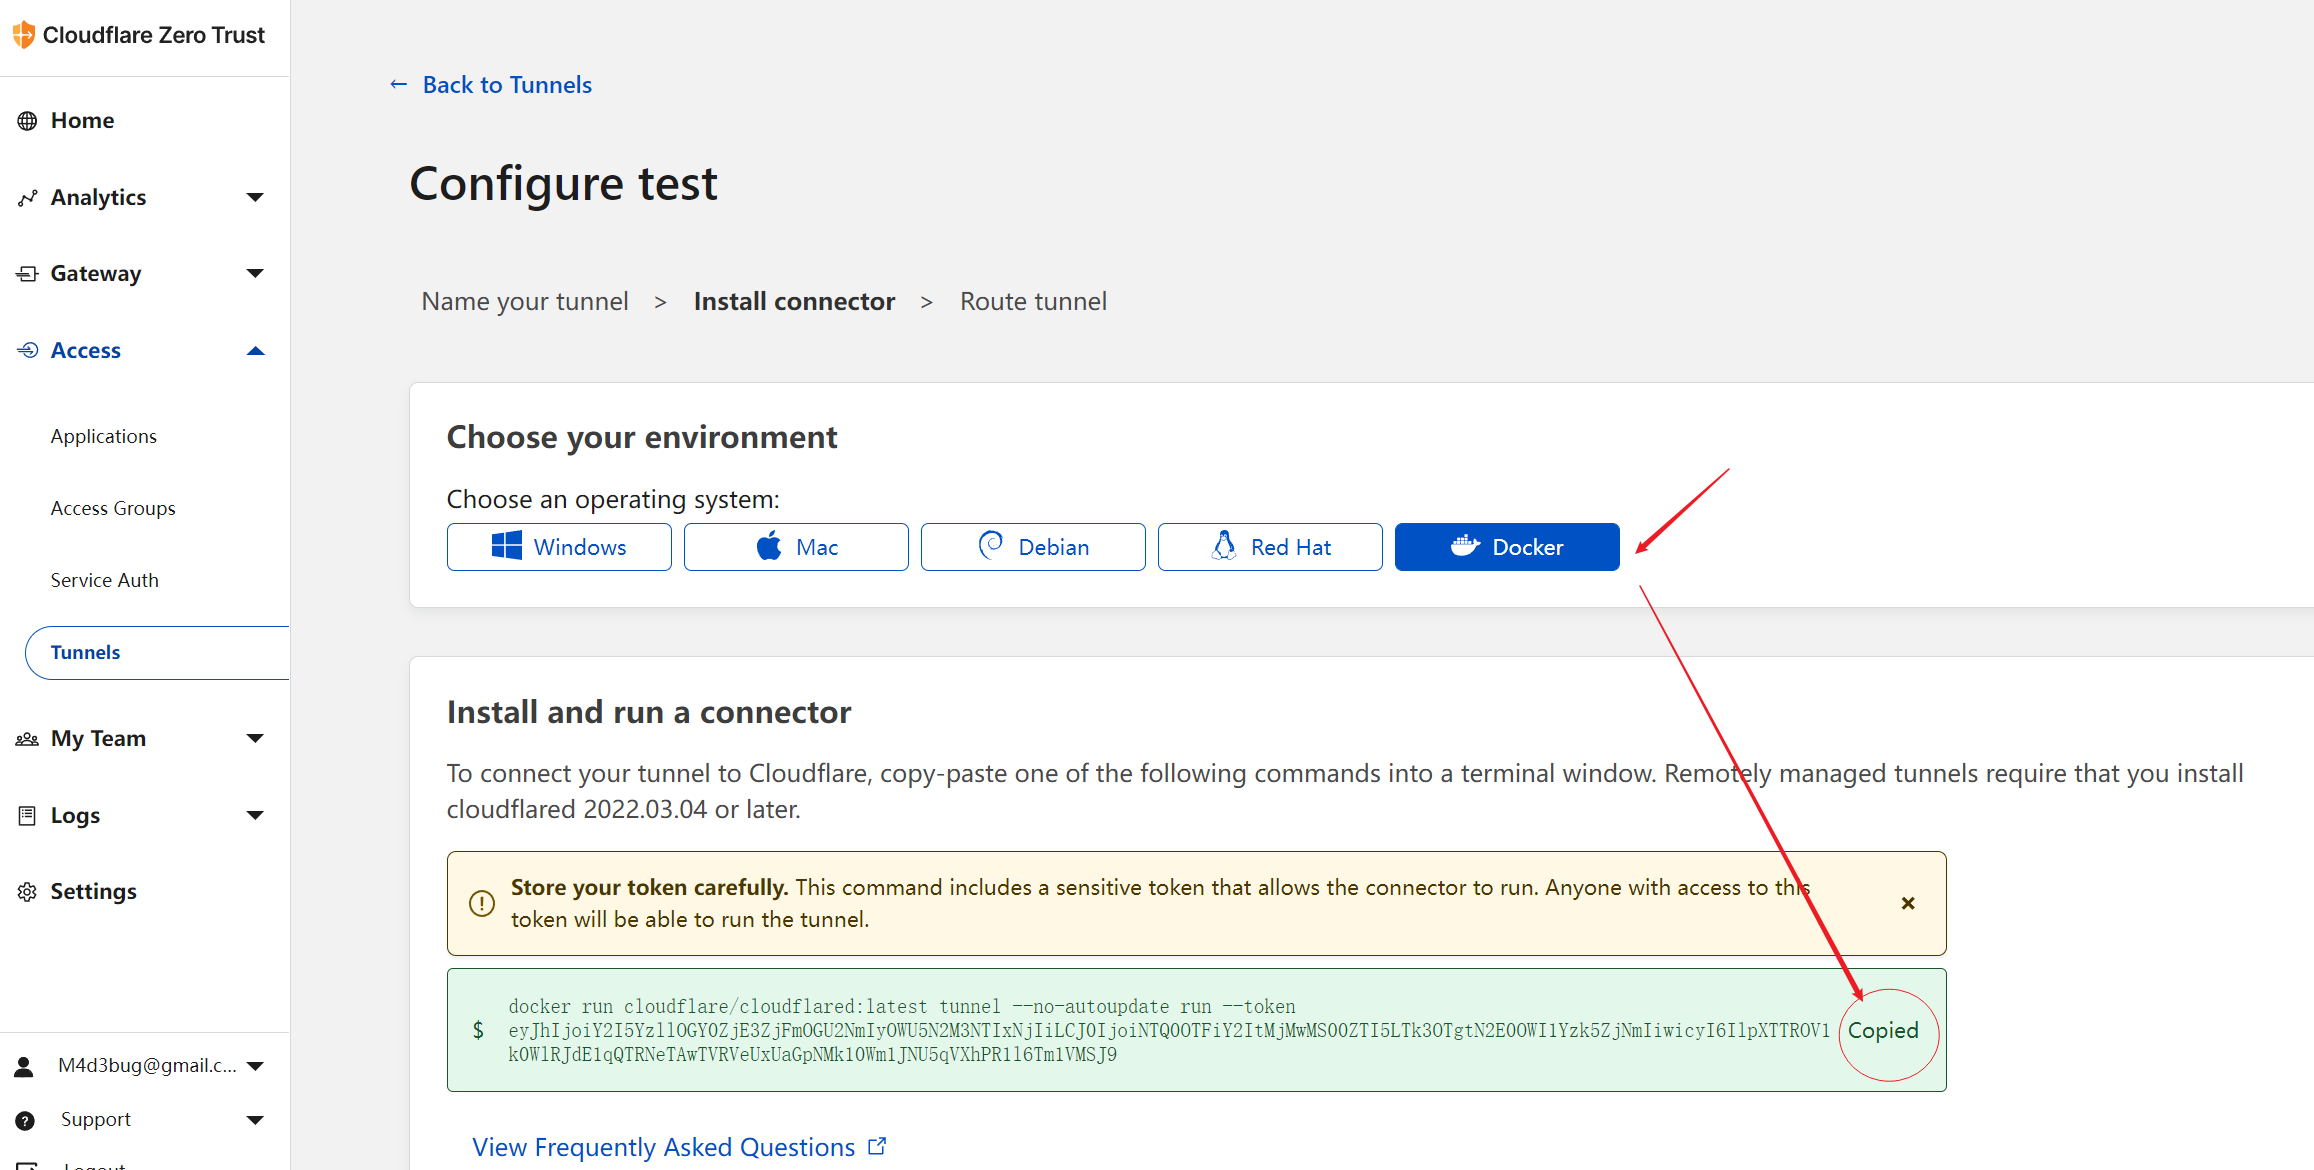
在完成上述cloudflare tunnel侧的设置,就可以回到vps,尝试进行cloudflared的第一次创建和连接。注意加入
--network reverseproxy-nw1
2
3
4
5
6
7
8docker run --network reverseproxy-nw cloudflare/cloudflared:latest tunnel --no-autoupdate run --token eyJhIjoiY2I5YzllOGY0ZjE3ZjFmOGU2NmIyOWU5N2M3NTIxNjIiLCJ0IjoiNTQ0OTFiY2ItMjMwMS00ZTI5LTk3OTgtN2E0OWI1Yzk5ZjNmIiwicyI6Ik1HTTRaVEkwTW1RdFlqWmxNaTAwT0RrekxUbGhPVFF0WWpBNFpUQTRNemMwT0RReSJ9
2022-10-18T10:59:08Z INF Thank you for trying Cloudflare Tunnel. Doing so, without a Cloudflare account, is a quick way to experiment and try it out. However, be aware that these account-less Tunnels have no uptime guarantee. If you intend to use Tunnels in production you should use a pre-created named tunnel by following: https://developers.cloudflare.com/cloudflare-one/connections/connect-apps
2022-10-18T10:59:08Z INF Requesting new quick Tunnel on trycloudflare.com...
2022-10-18T10:59:11Z INF +--------------------------------------------------------------------------------------------+
2022-10-18T10:59:11Z INF | Your quick Tunnel has been created! Visit it at (it may take some time to be reachable): |
2022-10-18T10:59:11Z INF | https://bars-bidding-tucson-transportation.trycloudflare.com |
2022-10-18T10:59:11Z INF +--------------------------------------------------------------------------------------------+
... 进展顺利,你就可以看到connectors显示以下信息了
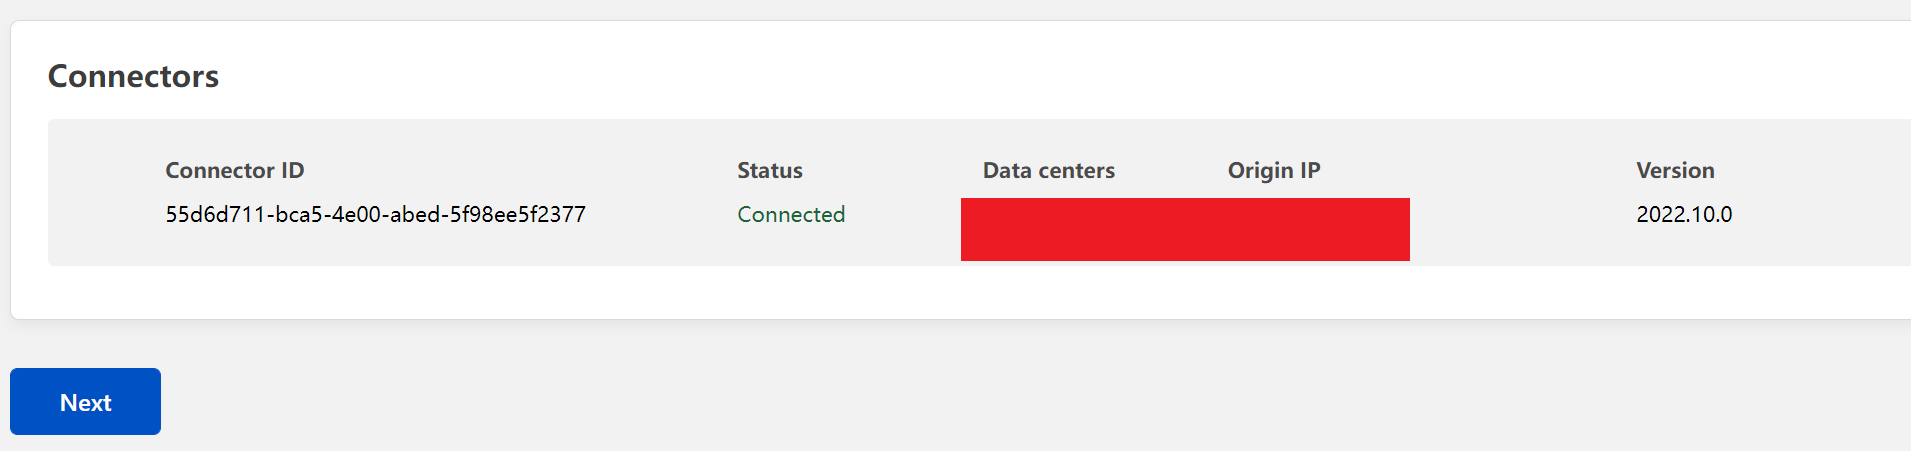
点击next进行headscale-ui的设置,,注意路径,以及关闭tls验证。PS: 一定要先设headscale-ui
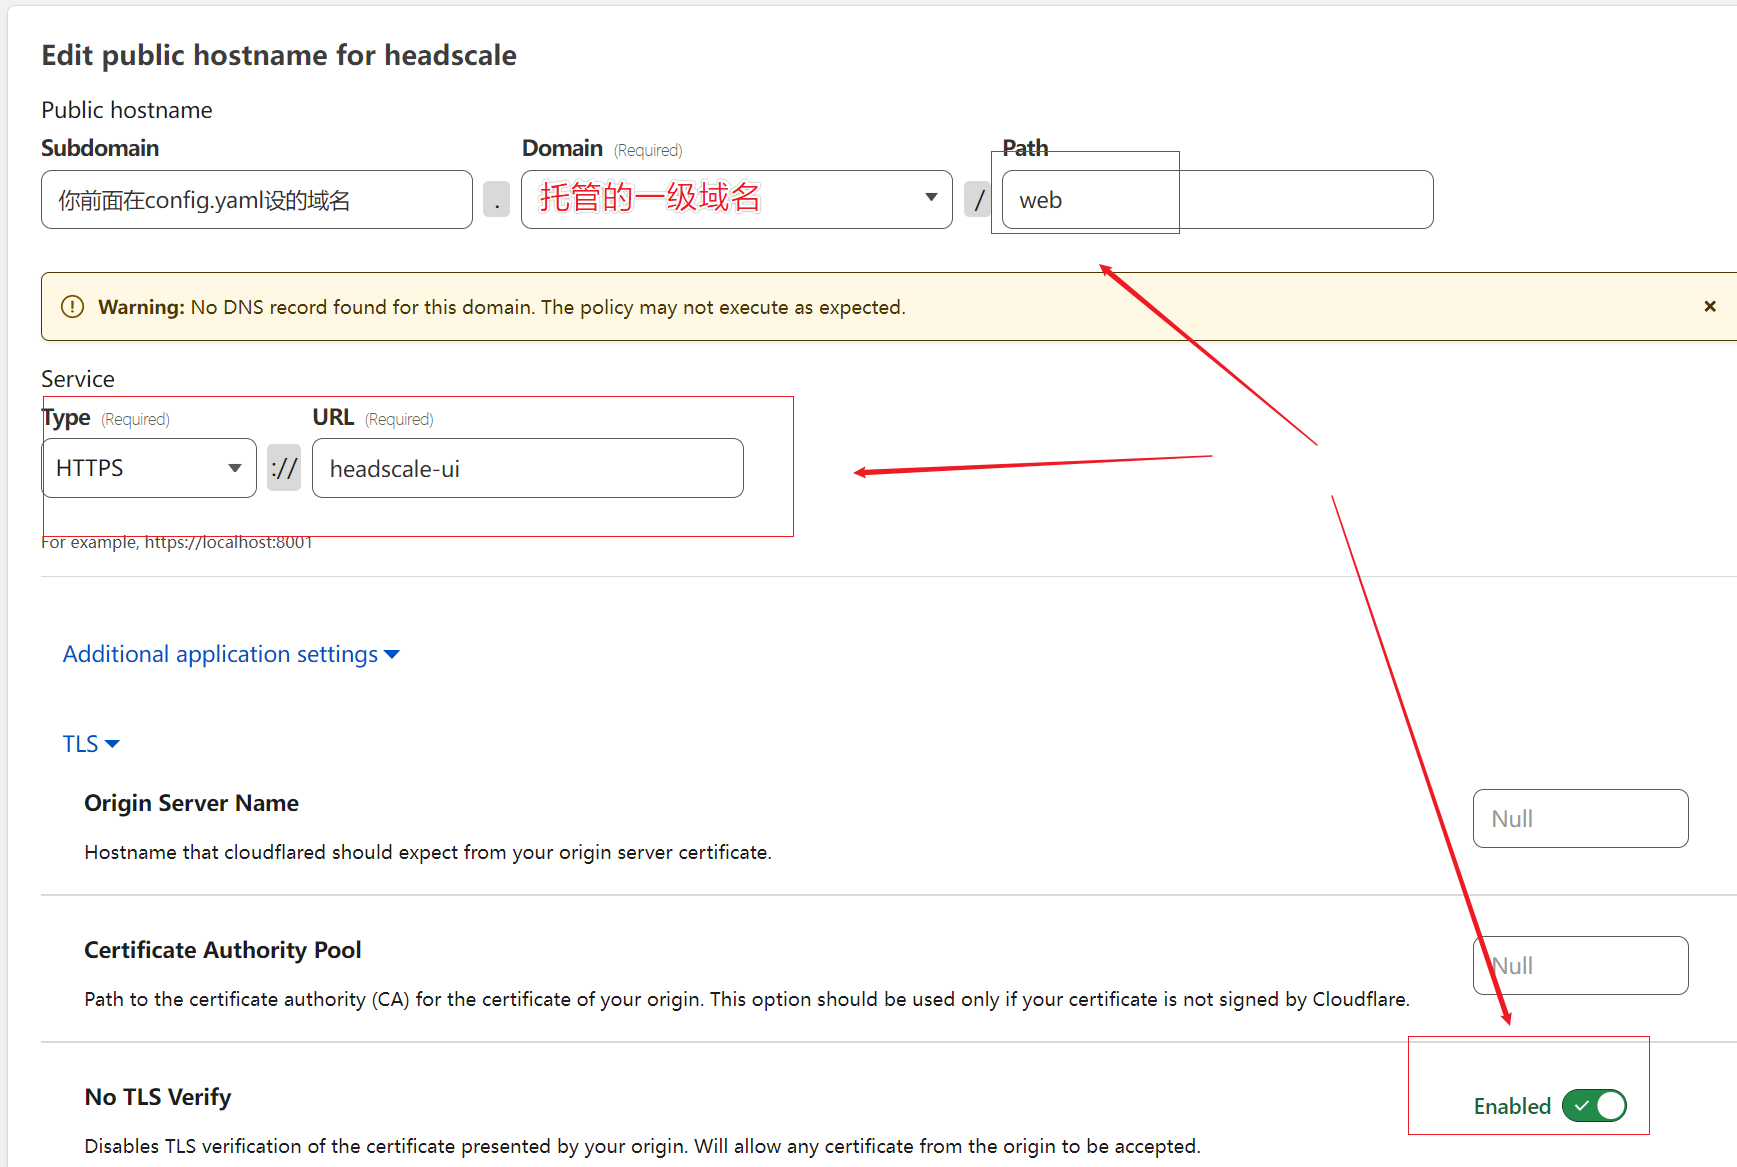
Save后再Add a public hostname 给headscale
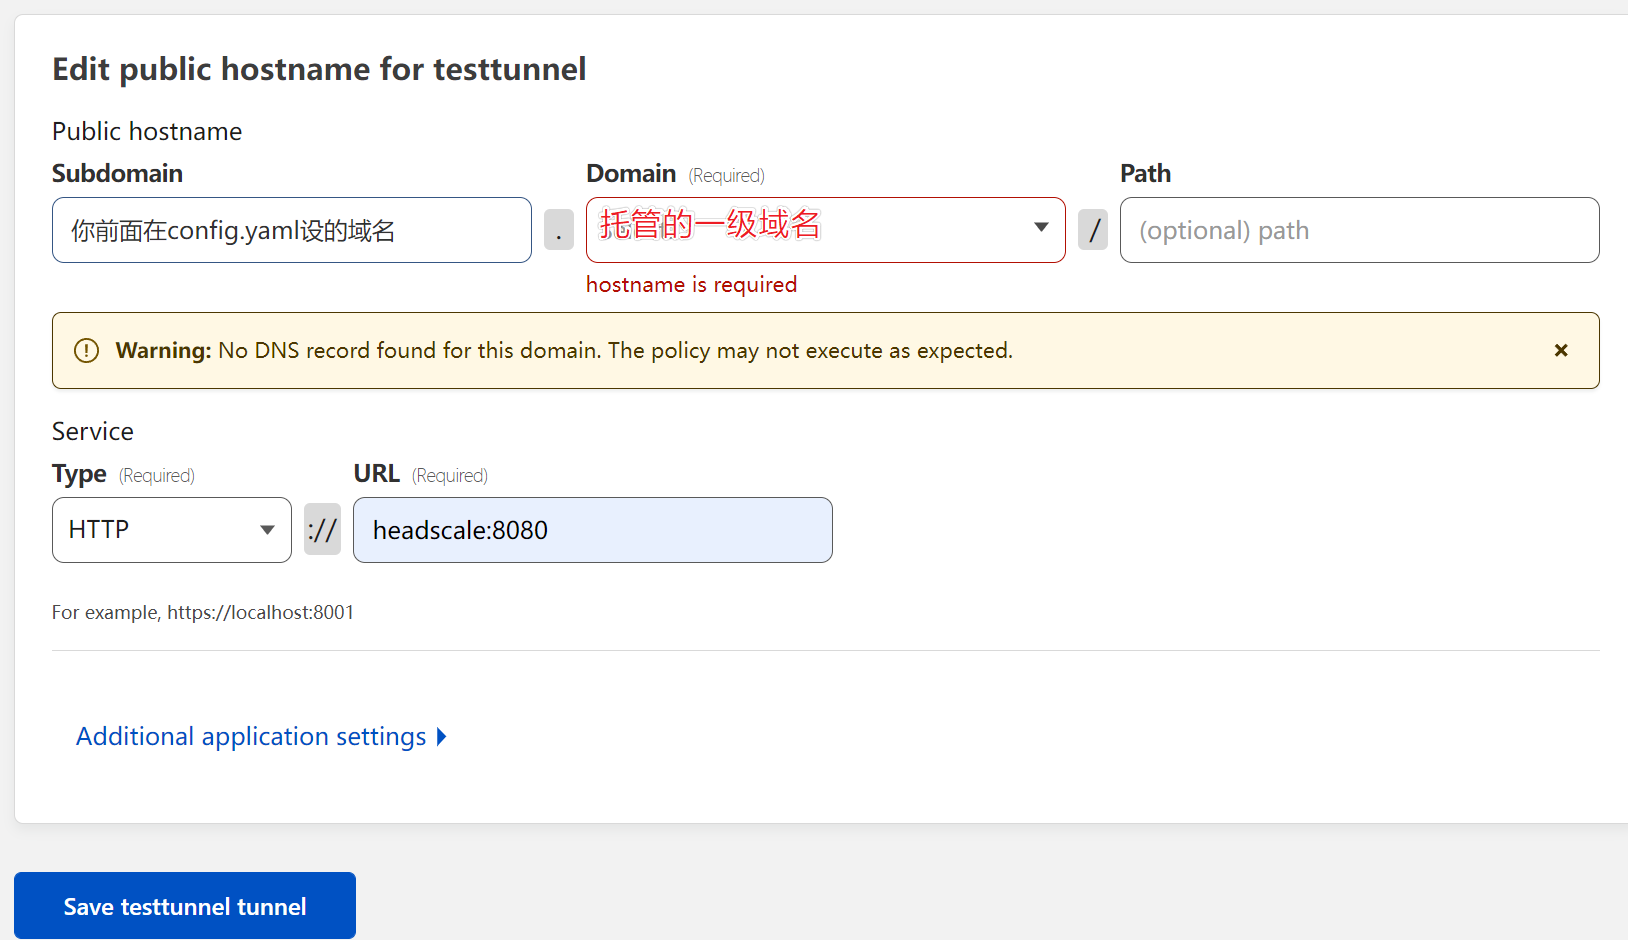
测试https://<域名>/windows,没问题就可以加入cloudflared到docker-compose.yaml了,它看起来应该是这样的。
1
2
3
4
5
6
7
8
9
10
11
12
13
14
15
16
17
18
19
20
21
22
23
24
25
26
27
28
29
30
31
32services:
headscale:
container_name: headscale
# image: headscale/headscale:latest-alpine
image: headscale/headscale:0.22.3
restart: always
# ports:
# - 8080:8080
volumes:
- ./container-config:/etc/headscale
- ./container-data:/var/lib/headscale
entrypoint: headscale serve
networks:
reverseproxy-nw:
headscale-ui:
container_name: headscale-ui
image: madebug/ghcr.io.gurucomputing.headscale-ui:latest
restart: always
networks:
reverseproxy-nw:
cloudflared:
container_name: cloudflared
image: cloudflare/cloudflared:latest
entrypoint: ["cloudflared", "tunnel", "--no-autoupdate", "run", "--token", "eyJhIjoiY2I5YzllOGY0ZjE3ZjFmOGU2NmIyOWU5N2M3NTIxNjIiLCJ0IjoiNTQ0OTFiY2ItMjMwMS00ZTI5LTk3OTgtN2E0OWI1Yzk5ZjNmIiwicyI6Ik1HTTRaVEkwTW1RdFlqWmxNaTAwT0RrekxUbGhPVFF0WWpBNFpUQTRNemMwT0RReSJ9"]
networks:
reverseproxy-nw:
networks:
reverseproxy-nw:
external: true没有问题直接
docker-compose up -dheadscale-ui部分
前面基本完成了90%的工作了,接下来就是登录headscale-ui进行一些登录的设置了。
headscale生成页面登录的token
1
$ docker exec headscale headscale apikeys create
访问https://<前面设定的域名>/web,然后填入token完成登录,点击
Test Server Settings。创建user就是创建namespace,用来隔离多个不同网段。
0x03 headscale客户端
安装tailscale客户端。
在headscale-ui创建Preauth Keys。
然后使用以下命令加入。
1
$ tailscale up --login-server https://<你前面的域名> --accept-routes=true --accept-dns=false --authkey <你自己设的Preauth Keys>
Windows 加入方法。
1
https://<你前面的域名>/windows
0x04 结语
headscale的打洞能力超强,并且自身还可以搭配/作为derper(derper类似zerotier的moon)。
headscale本身只是实现了服务端,客户端可以直接沿用tailscale进行加入。
迁移的时候除了
containers-data下的private.key不需要之外,其他都需要迁走。我们的方案用了cloudflare tunnel,当然可以优选出优质ip,然后在软路由侧写入解析。
还是很建议单独搭一个derper的,未必要把官方的derper全部去掉,但是这打洞效率很高。
-
1
tailscale up --login-server https://<你前面的域名> --accept-routes=true --accept-dns=false --authkey <你自己设的Preauth Keys> --advertise-routes=x.x.x.x/xx,x.x.x.x/xx