本文旨在嘗試驗證自己的一個奇葩想法。
0x00 機器情況
| 供應商 | 規格 | 機房位置 |
|---|---|---|
| 騰訊雲 | 2C8G | 中國上海 |
| 搬瓦工 | 2C2G | 美國洛杉磯 |
| Ucloud | 1C1G | 中國香港 |
0x01 ZeroTier部分
加入ZeroTier組網
安裝軟體
1 | # curl -s https://install.zerotier.com/ | sudo bash |
加入網絡
1 | # zerotier-cli join xxxxxxxxxxxxxxxx |
機器網絡狀況
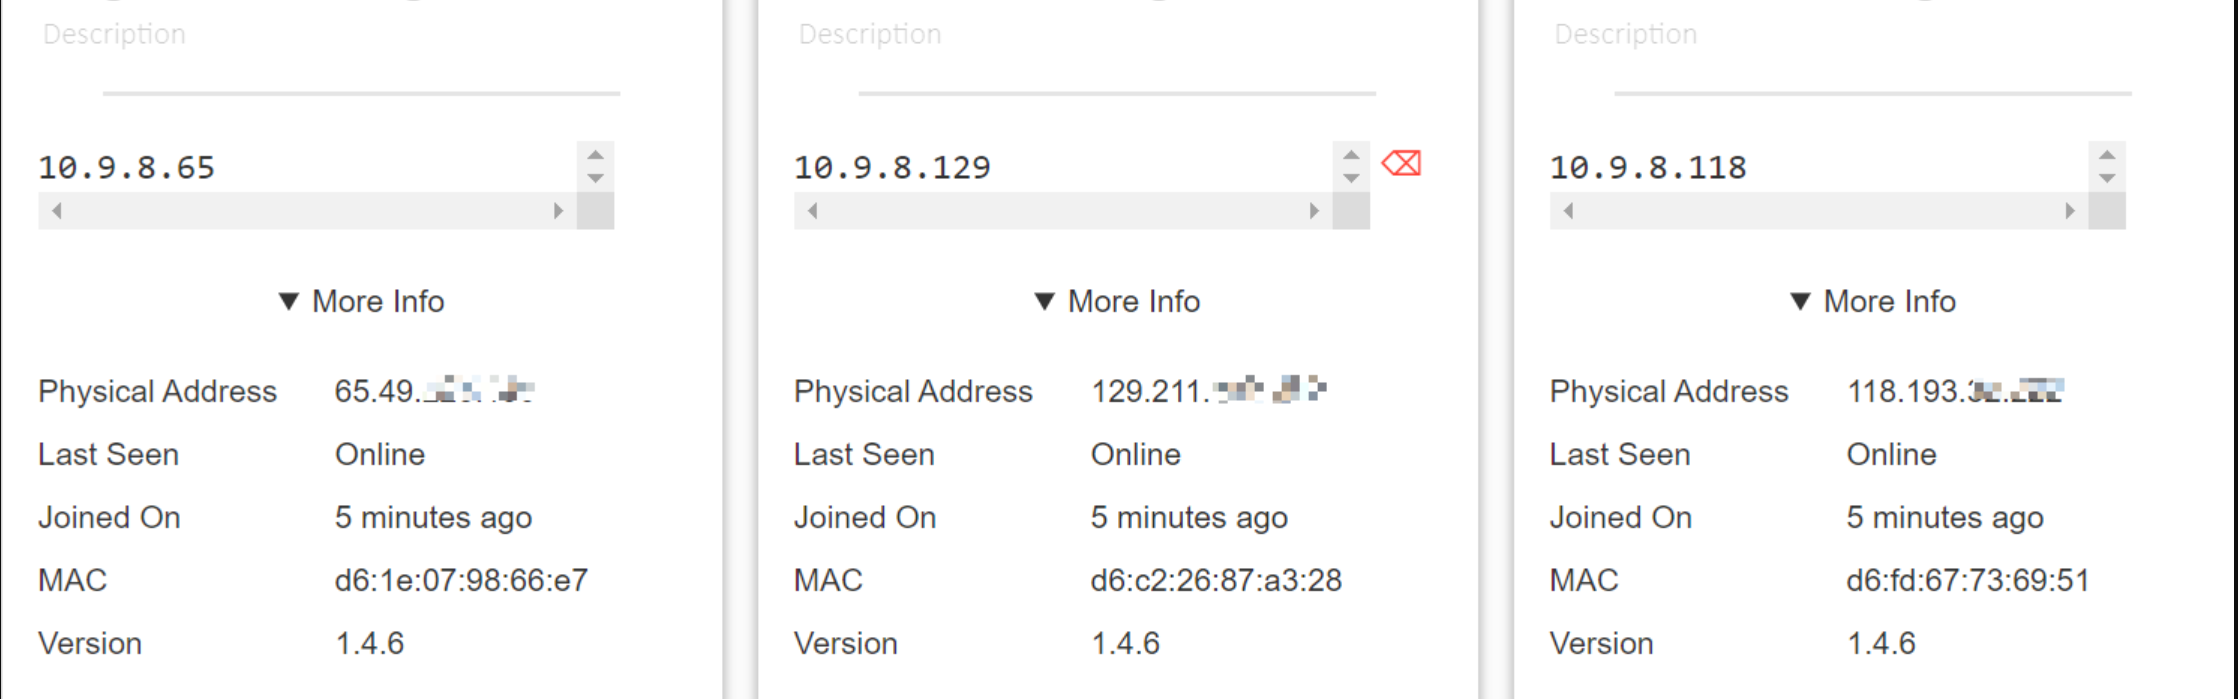
寫入靜態IP 和hostname
1 | # cat >> /etc/hosts << EOF |
0x02 K8S 部分
系統預設定
確保selinux為寬容模式
1 | # setenforce 0 |
關閉firewalld
云供應商們基本都關掉了,所以沒什麽回顯。
1 | # systemctl disable firewalld |
选择性關閉swap
在master節點以外操作。
1 | # swapoff -a |
設置并啓用内核參數
1 | # cat <<EOF > /etc/sysctl.d/k8s.conf |
開始安裝
安裝Docker軟體
1 | # yum-config-manager \ |
加入代理設定到Docker中
順便説一嘴,可以在ZeroTier組網裏起一個代理。
1 | # mkdir /usr/lib/systemd/system/docker.service.d |
加入谷歌倉庫
同樣加入ZeroTier中的代理地址。
1 | # cat <<'EOF' > /etc/yum.repos.d/kubernetes.repo |
獲得必須的軟體及鏡像
1 | # yum -y install kubeadm kubelet kubectl |
master節點只是一隻小鷄鷄,所以就不關它的swap了。
1 | # vim /etc/sysconfig/kubelet |
安裝集群
在v1.8.0之後的版本,kubeadm提供了一種分階段的構建方式,構建etcd是其中的一個phase,在啓動前我們需要對其中的參數進行修改。
定制該版本的kubeadm-config.yml
1
2
3
4
5
6
7
8
9
10
11
12
13
14
15
16
17
18
19
20
21
22
23
24
25
26
27
28
29
30
31
32
33
34
35
36
37
38
39
40
41# kubeadm config print init-defaults > kubeadm-config.yaml
# vim kubeadm-config.yaml
apiVersion: kubeadm.k8s.io/v1beta2
bootstrapTokens:
- groups:
- system:bootstrappers:kubeadm:default-node-token
token: abcdef.0123456789abcdef
ttl: 24h0m0s
usages:
- signing
- authentication
kind: InitConfiguration
localAPIEndpoint:
advertiseAddress: 10.9.8.118 <---網卡ip
bindPort: 6443
nodeRegistration:
criSocket: /var/run/dockershim.sock
name: master.m4d3bug.com
taints:
- effect: NoSchedule
key: node-role.kubernetes.io/master
---
apiServer:
timeoutForControlPlane: 4m0s
apiVersion: kubeadm.k8s.io/v1beta2
certificatesDir: /etc/kubernetes/pki
clusterName: kubernetes
controllerManager: {}
dns:
type: CoreDNS
etcd:
local:
dataDir: /var/lib/etcd
imageRepository: k8s.gcr.io
kind: ClusterConfiguration
kubernetesVersion: v1.18.0
networking:
dnsDomain: cluster.local
serviceSubnet: 10.96.0.0/12
podSubnet: 10.244.0.0/16 <---pod子網範圍
scheduler: {}preflight階段
1
# kubeadm init phase preflight --config kubeadm-config.yaml --ignore-preflight-errors=NumCPU --ignore-preflight-errors=Swap
kubelet-start階段
1
# kubeadm init phase kubelet-start --config kubeadm-config.yaml
cert階段
1
# kubeadm init phase certs all --config kubeadm-config.yaml
kubeconfig階段
1
# kubeadm init phase kubeconfig all --config kubeadm-config.yaml
control-plane階段
1
# kubeadm init phase control-plane all --config kubeadm-config.yaml
etcd 階段
1
2
3
4
5
6
7
8
9
10
11
12
13
14
15
16
17
18
19
20
21
22
23
24
25
26
27
28
29
30
31
32
33
34
35
36
37
38
39
40
41
42
43
44
45
46
47
48
49
50
51
52
53
54
55
56
57
58
59
60
61
62
63
64
65
66
67
68
69# kubeadm init phase etcd local --config kubeadm-config.yaml
# vim /etc/kubernetes/manifests/etcd.yaml
apiVersion: v1
kind: Pod
metadata:
annotations:
kubeadm.kubernetes.io/etcd.advertise-client-urls: https://10.9.8.118:2379
creationTimestamp: null
labels:
component: etcd
tier: control-plane
name: etcd
namespace: kube-system
spec:
containers:
- command:
- etcd
- --advertise-client-urls=https://10.9.8.118:2379
- --cert-file=/etc/kubernetes/pki/etcd/server.crt
- --client-cert-auth=true
- --data-dir=/var/lib/etcd
- --initial-advertise-peer-urls=https://10.9.8.118:2380
- --initial-cluster=master.m4d3bug.com=https://10.9.8.118:2380
- --key-file=/etc/kubernetes/pki/etcd/server.key
- --listen-client-urls=https://0.0.0.0:2379 <--- 改爲0.0.0.0
- --listen-metrics-urls=http://127.0.0.1:2381
- --listen-peer-urls=https://0.0.0.0:2380 <--- 改爲0.0.0.0
- --name=master.m4d3bug.com
- --peer-cert-file=/etc/kubernetes/pki/etcd/peer.crt
- --peer-client-cert-auth=true
- --peer-key-file=/etc/kubernetes/pki/etcd/peer.key
- --peer-trusted-ca-file=/etc/kubernetes/pki/etcd/ca.crt
- --snapshot-count=10000
- --trusted-ca-file=/etc/kubernetes/pki/etcd/ca.crt
image: k8s.gcr.io/etcd:3.4.3-0
imagePullPolicy: IfNotPresent
livenessProbe:
failureThreshold: 8
httpGet:
host: 127.0.0.1
path: /health
port: 2381
scheme: HTTP
initialDelaySeconds: 15
timeoutSeconds: 15
name: etcd
resources: {}
volumeMounts:
- mountPath: /var/lib/etcd
name: etcd-data
- mountPath: /etc/kubernetes/pki/etcd
name: etcd-certs
hostNetwork: true
priorityClassName: system-cluster-critical
volumes:
- hostPath:
path: /etc/kubernetes/pki/etcd
type: DirectoryOrCreate
name: etcd-certs
- hostPath:
path: /var/lib/etcd
type: DirectoryOrCreate
name: etcd-data
status: {}
# echo "export KUBECONFIG=/etc/kubernetes/admin.conf" >> ~/.bash_profile
# source ~/.bash_profile
# kubectl apply -f /etc/kubernetes/manifests/etcd.yaml
# kubeadm init --skip-phases=preflight,certs,kubeconfig,kubelet-start,control-plane,etcd --config kubeadm-config.yaml之後就如下:
1
2
3
4
5
6
7
8
9
10
11
12
13
14
15
16Your Kubernetes control-plane has initialized successfully!
To start using your cluster, you need to run the following as a regular user:
mkdir -p $HOME/.kube
sudo cp -i /etc/kubernetes/admin.conf $HOME/.kube/config
sudo chown $(id -u):$(id -g) $HOME/.kube/config
You should now deploy a pod network to the cluster.
Run "kubectl apply -f [podnetwork].yaml" with one of the options listed at:
https://kubernetes.io/docs/concepts/cluster-administration/addons/
Then you can join any number of worker nodes by running the following on each as root:
kubeadm join 10.9.8.118:6443 --token abcdef.0123456789abcdef \
--discovery-token-ca-cert-hash sha256:f14e90eda52b285b41ddb5d34a4dcf21f55ed66831015c4ca1a996cf17754143部署flannel
1
2
# wget https://raw.githubusercontent.com/coreos/flannel/master/Documentation/kube-flannel.yml
# kubectl apply -f kube-flannel.yml
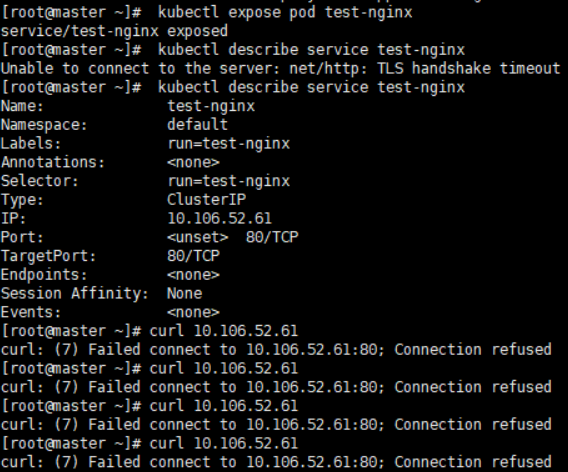
排障
1 | 查看pod日志 |
結語
一套下來,UDP的通信可靠性還是名不虛傳,除非等待HTTP3.0/quic協議普及吧,這樣子運營商也許就不會對UDP那麽狠了,所以奉勸各位還是別折騰這條路了,後面或許會嘗試使用GRE方式來再嘗試一次。以下是部署后情況:
可以見到,即使加入成功也都是充斥著大量因爲timeout造成的failed的信息在其中。
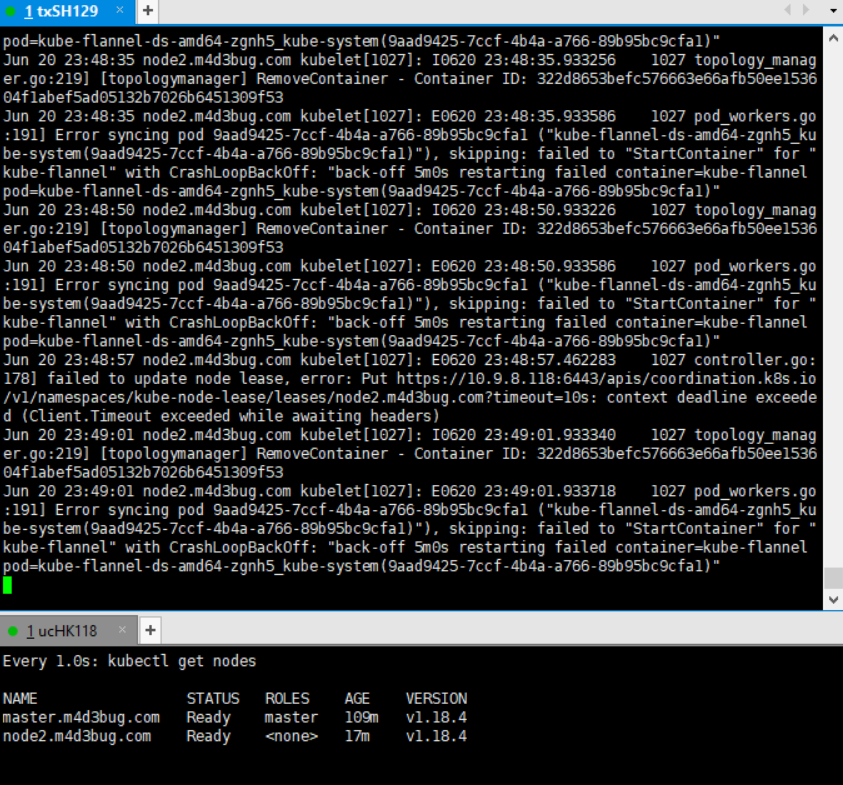
其後,通過睡了一覺,白天時分,QOS緩和的時候,順利將剩下搬瓦工節點加入。
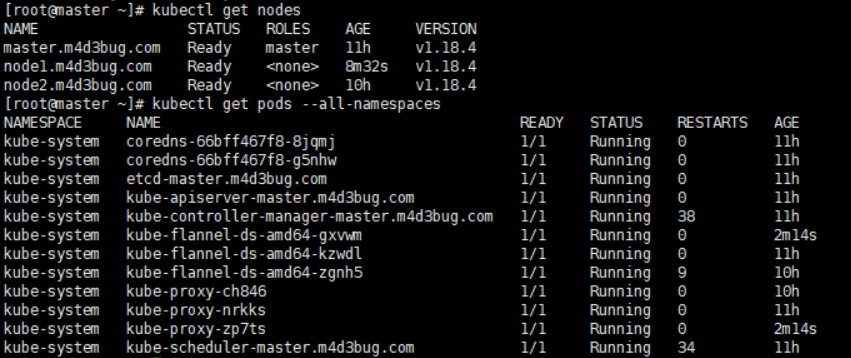
但也證明,SDN跨運營商,以node為最小單位組建K8S集群是可行的,但是需要💰。因此不難理解爲什麽現在混合雲架構都是傾向于以一個帶master節點集群為最小單位組建集群。或許可以試試每個節點都是單master的去污點化部署。